For this new SCCM tutorial, we will see how to automatically deploy the security updates and critical updates to Windows Server 2012 R2. This tutorial is of course applicable to any type of server operating system or even customer. We will use the ADR or “Automatic Deployment Rules” to deploy all these updates. Using the ADR, we can automate and so to industrialize the deployment of our updates. Once configured they will be automatically deployed depending on the settings.
Nod to the crypto #WannaCry
To create a new ADR, go in the section “Software Library” then in the sub tab “Software Updates”, click on “Create Automatic Deployment Rule”. 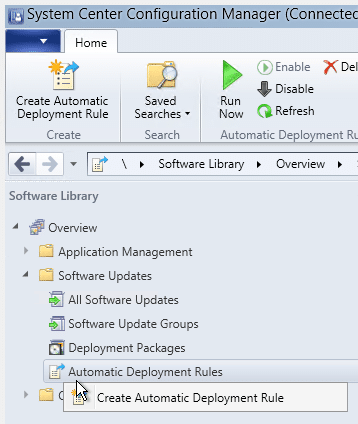
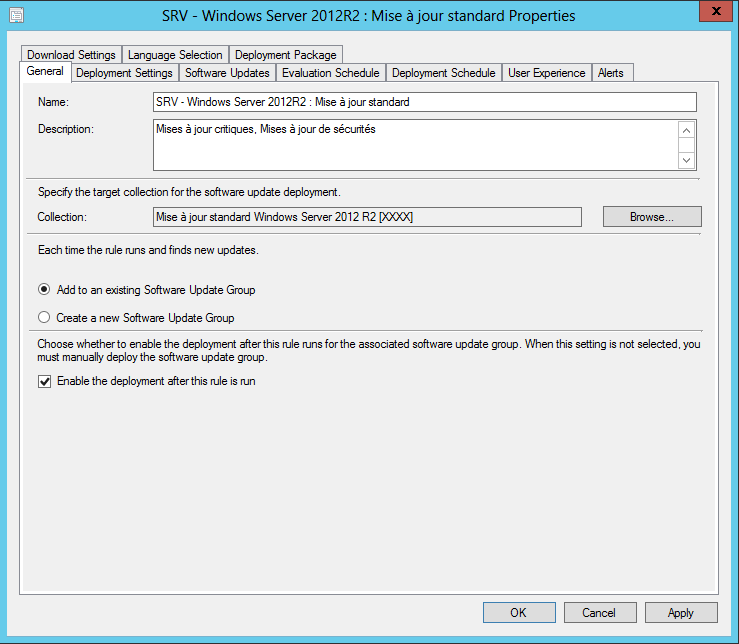
Fill in the following fields:
- <strong>Name</strong>: Enter a name for your ADR
- Description: Provide a description to your ADR
- Collection: Select the Group on which you want to deploy updates
Select “Add year to existing Software Update Group” only if you want to create a single group of updates. With this choice, all new updates will be added to the existing group of updates. Check the last box according to your need, then click “Ok” to continue.
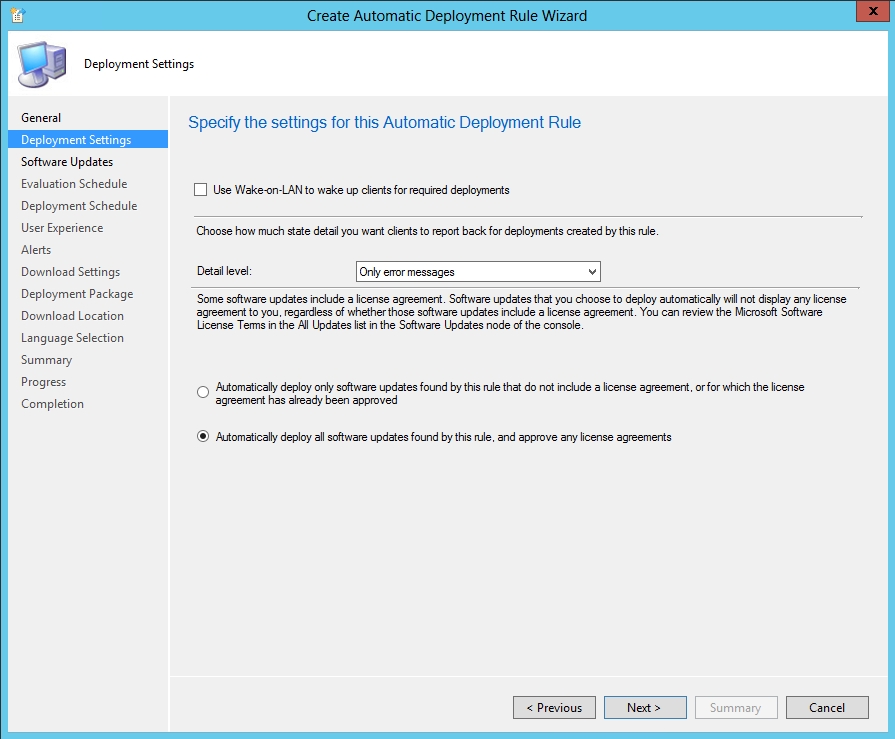
Select “Only error messages” and “Automatically deploy all software updates found…” and then click “Next”.
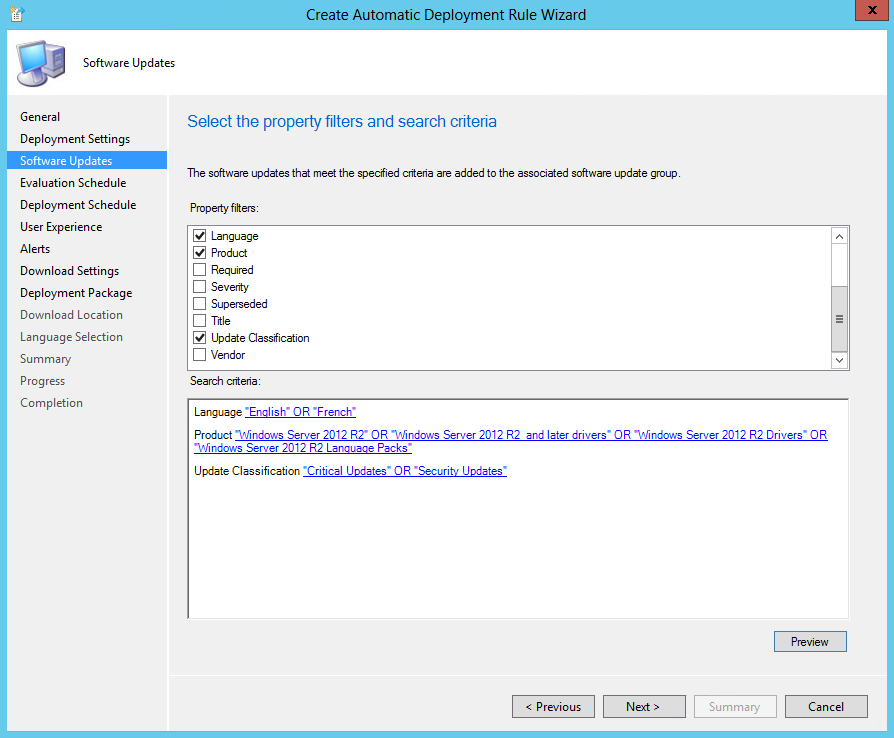
For our need, here are the filters that you choose.
- Language: English OR French (only if you have environments in french and English, otherwise check only the French).
- Product: Windows Server 2012 R2 (and its derivatives)
- Update Classification: Critical Updates OR Security Updates
Note: If you want to use this ADR for another system, you simply choose a different “Product”
Click “Next” to continue.
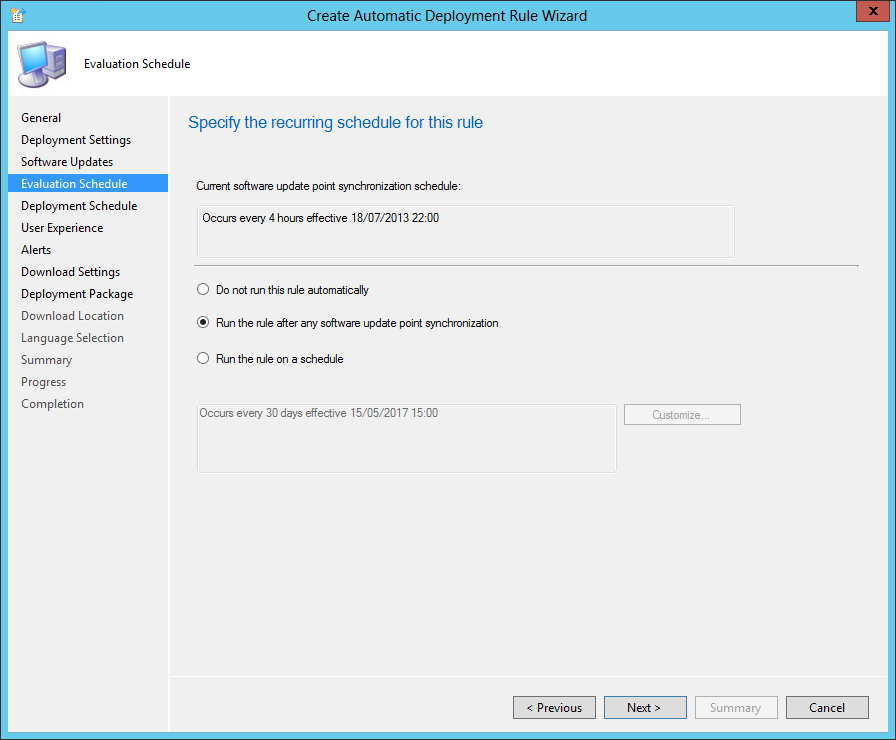
Click on “Run the rule after any software update point synchronization”, which means that your deployment rule will be executed after each synchronization to populate your group up to date with the latest news.
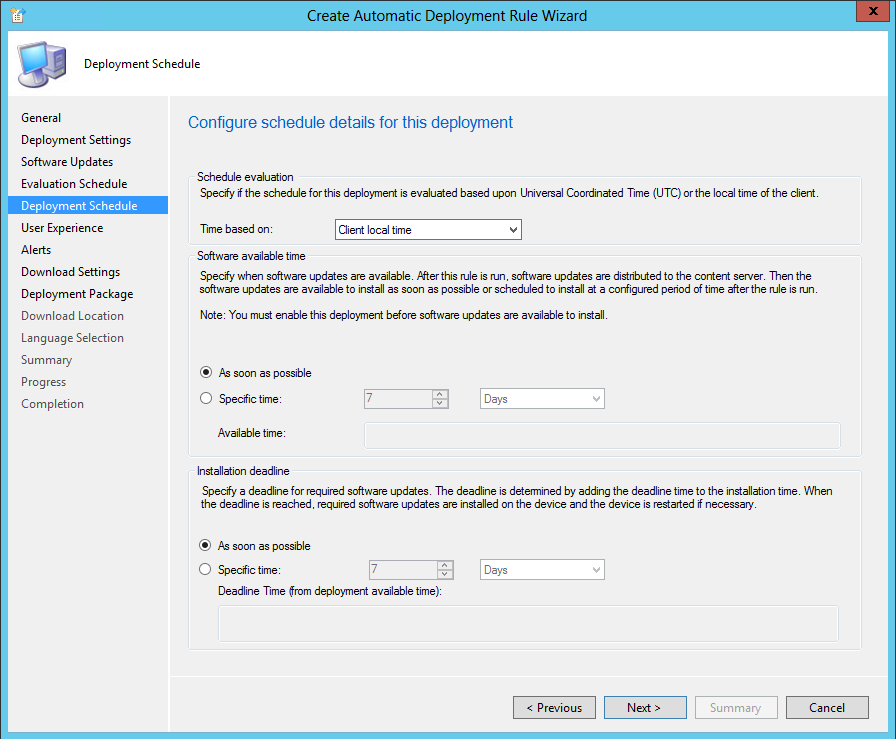
Select “customer local time” for the provision of updates as well as the deadline and then choose “As soon as possible”.
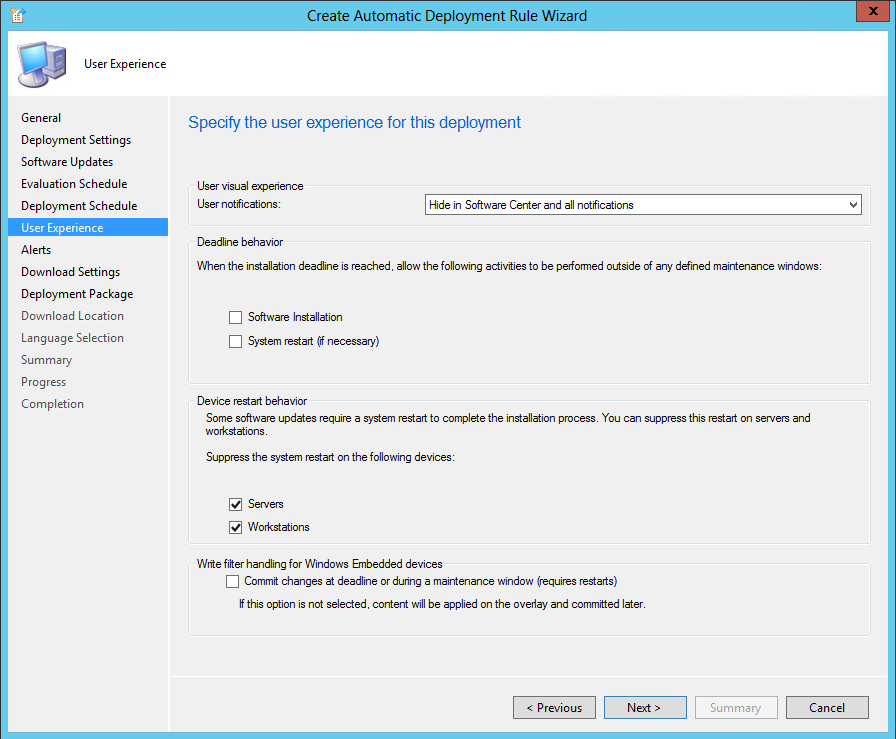
Here we are in the configuration of the user experience. For my part, I wish never view details or notify my users during a deployment. That’s why I select the setting “Hide in Software Center and all notifications”. In addition to avoid all a system restart, tick the boxes “Servers” and “Workstations”. Continue by clicking “Next”.
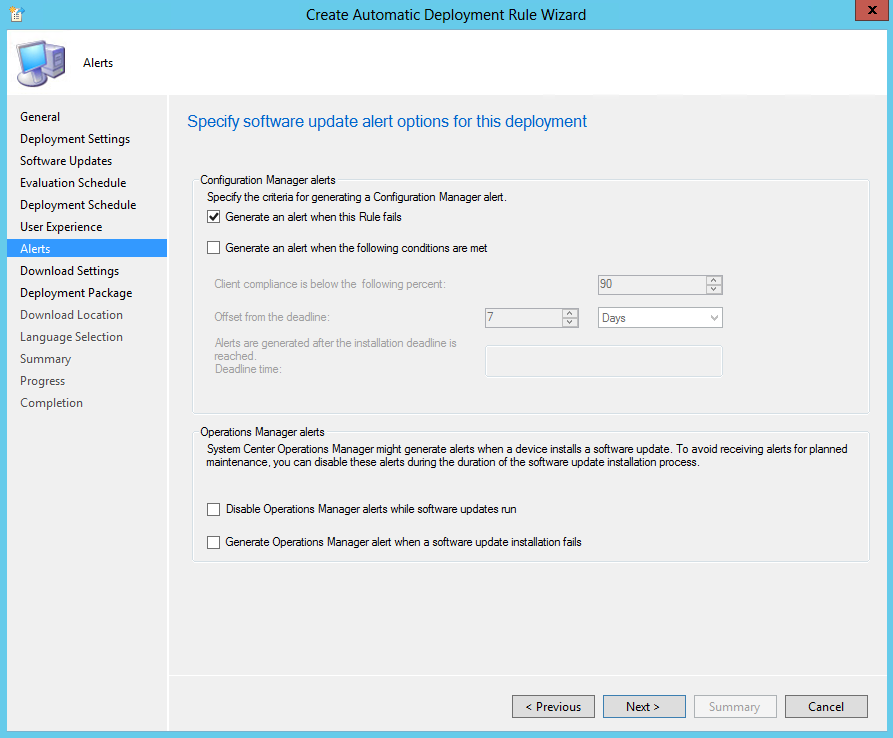
Depending on your systems of supervision and/or your needs, it is possible to generate and manage alerts (to play). When you have completed the settings, click “Next”.
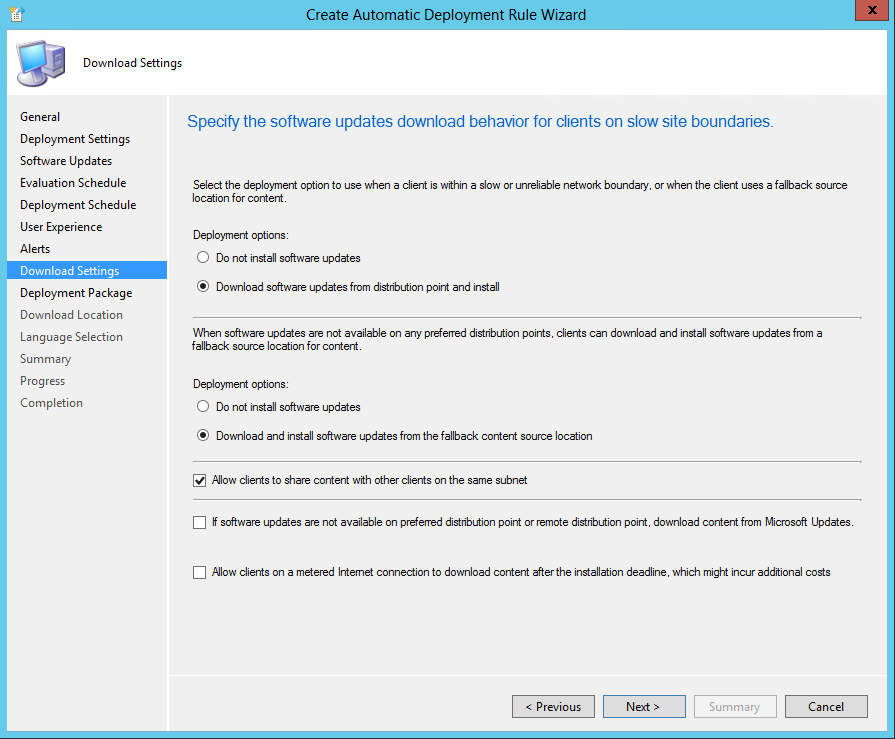
When the station is in a network with a limited flow, you can decide to install updates directly from the distribution point or else do nothing. In addition, it is possible to configure a source of backup content when updates are not available on the preferred distribution point or to do nothing. Finally, check the box “Allow customers to share content with other clients on the same subnet”.
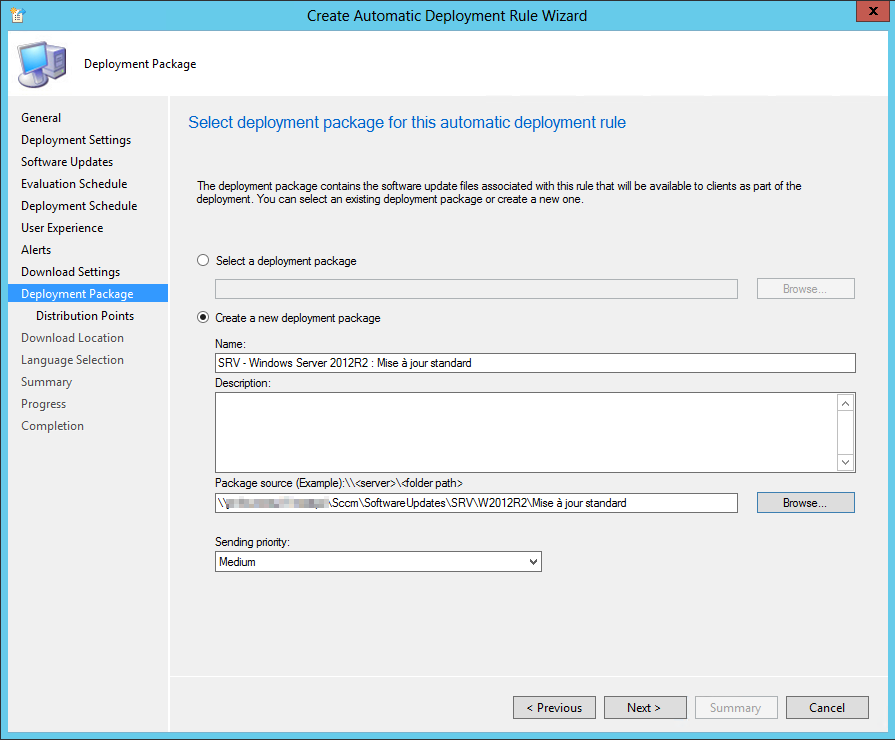
We’re going for the opportunity to create a new deployment package, complete the following information:
- Name: The name of the future package
- Description: The description of the package
- Source package: sharing or will be stored the package and its updates
- Priority: Priority of send
Click “Next” to continue.
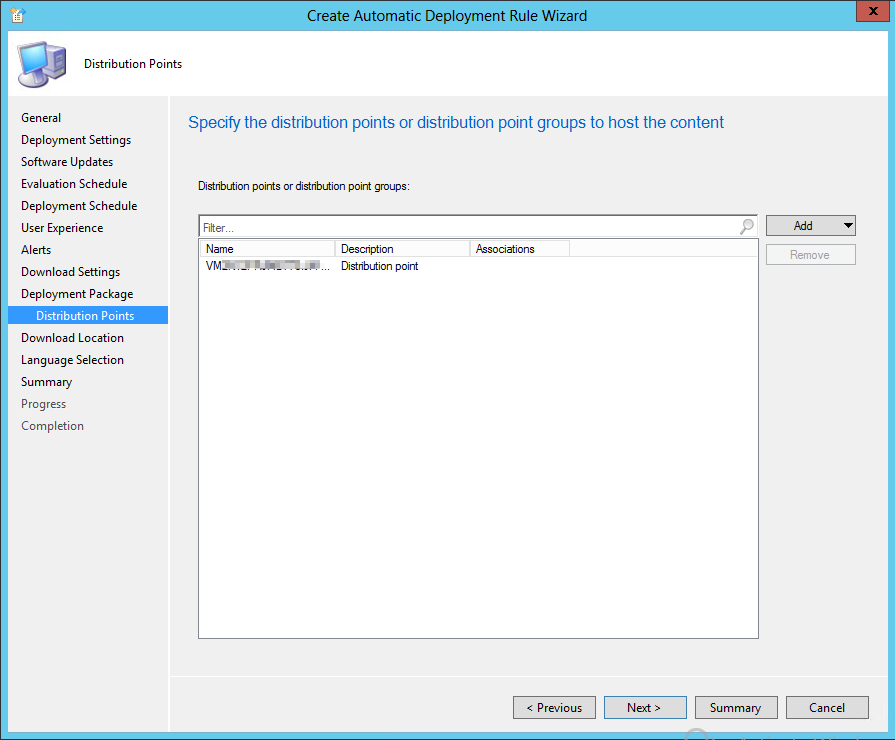
Select the distribution point to which you want to send the package.
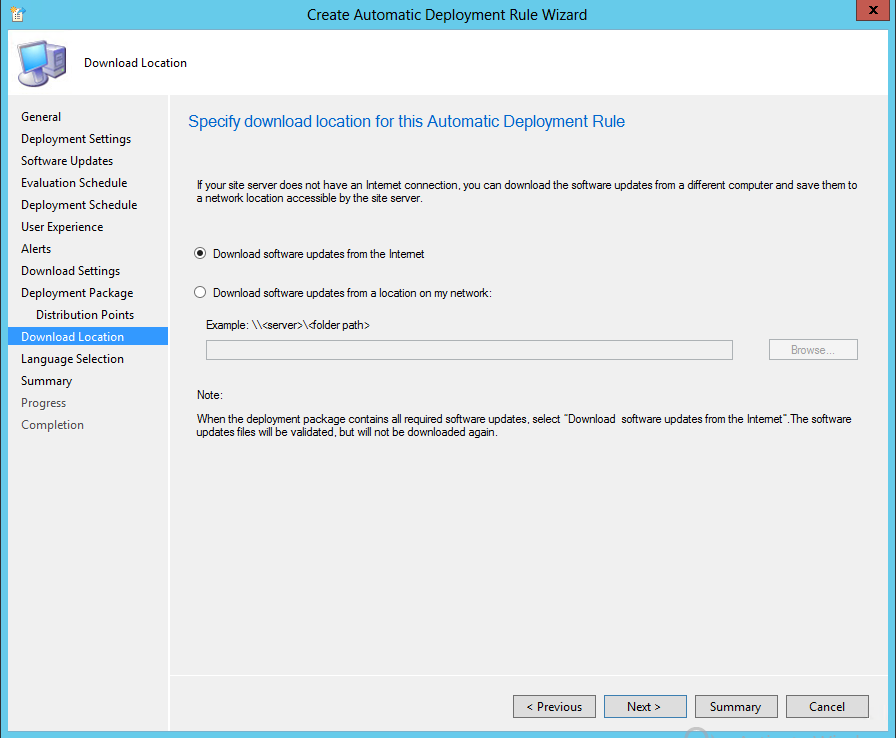
Select “Download software updates from the Internet” and click “Next”.
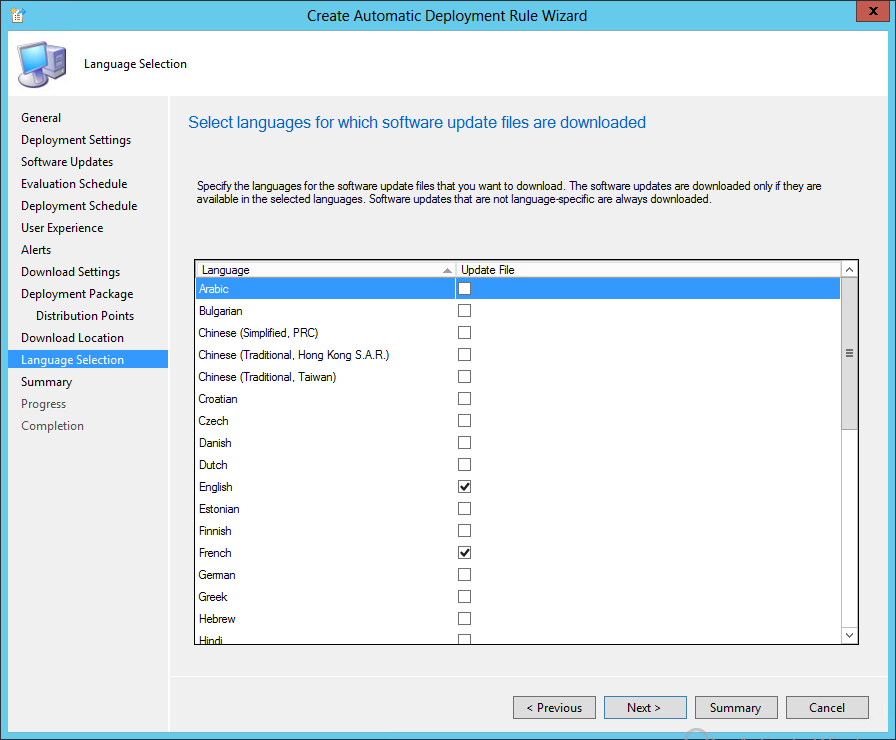
Check the different languages (English and French for my part) and then click “Next”.
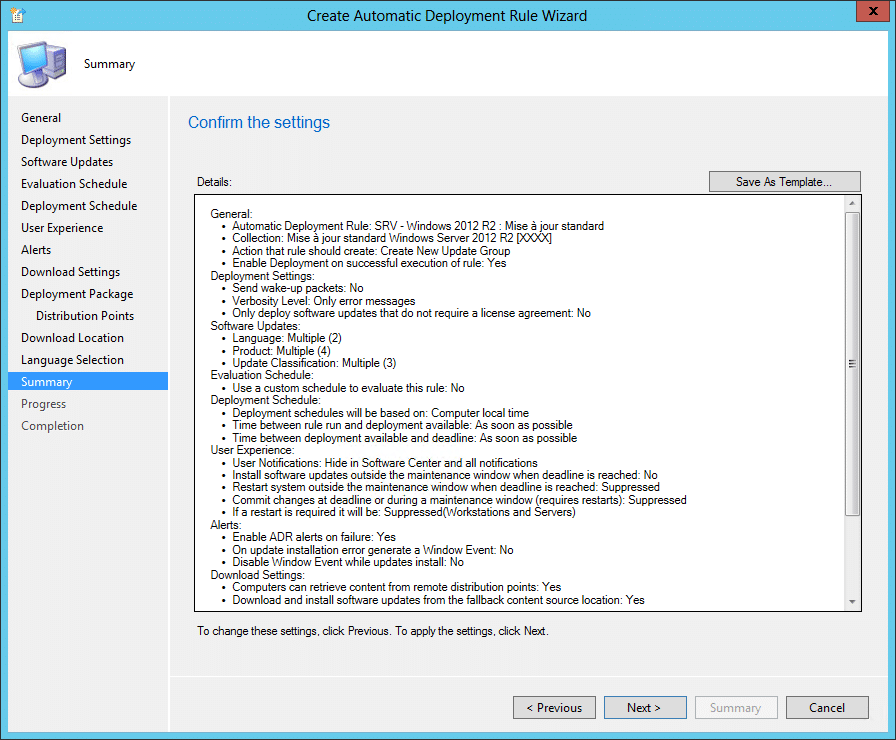
Here are the full details of ADR. Note that it is possible to save all the configuration that you have performed in a template so you can reuse it later for another deployment to the same type. Click “Next” to continue.
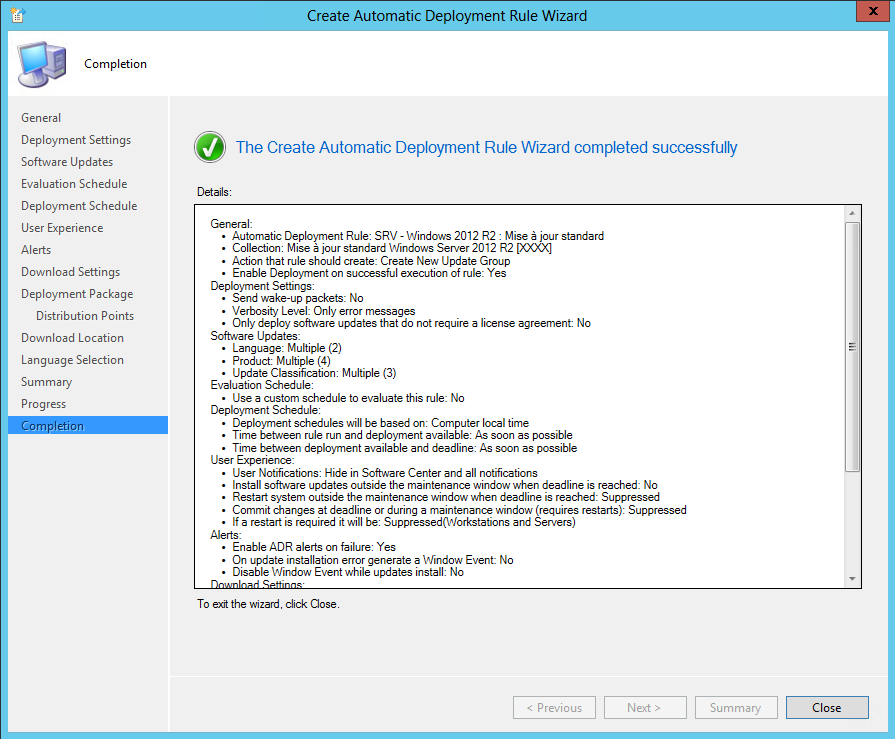
Your new ADR is now properly created, you can close the window.
ADR in image… It remains only to wait a few minutes (see more.. 🙂 ). To speed things up, you can click on the rule and then click “Run Now”. In any case it will take time to download all updates matching the filter that you set earlier.



![[TEST]-Xiaomi: Getting Started with the Xiaomi Roborock S50](https://sys-advisor.com/wp-content/uploads/2019/02/splash_xiaomi_roborock-100x70.jpg)
![[TUTO] – Recalbox : How to add new ROMS to your Recalbox](https://sys-advisor.com/wp-content/uploads/2017/12/splash_recalbox-100x70.png)
![[TUTO]-Skype Enterprise: How to connect to Skype online in Powershell](https://sys-advisor.com/wp-content/uploads/2017/12/smash_skype_enterprise-1-100x70.jpg)

