Back for a new tutorial, we will see here in detail the installation of SCOM 2016.
System Center Operation Manager (SCOM says) is one of the applications in the suite System Center, which takes place on the field of supervision and monitoring. With SCOM, it will be possible to supervise and monitor your Windows systems, Linux systems and network infrastructures.
It is also possible now to interface with Operation Management Suite product (says OMS) which meanwhile is part of the new cloud apps in Azure.
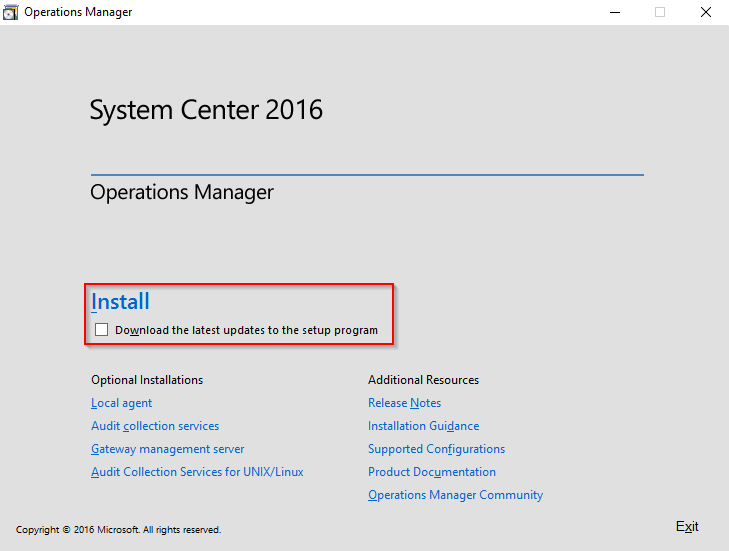
Run the SCOM installation setup and then click “Install”.
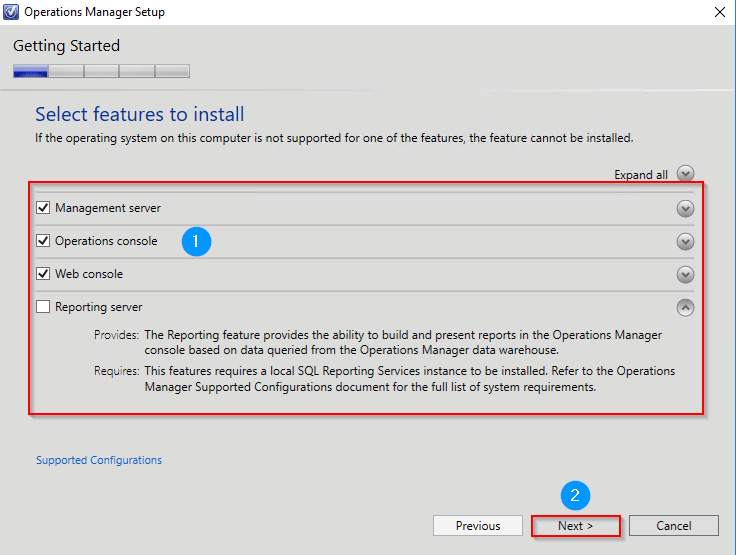
Check the boxes:
- Management Server: This is the main role, the installation of the management server
- Operations console: this is the client console heavy to administer SCOM
- Web Console: It comes to the deployment of the layer IIS, web site administration and web service
We will not make the party Reporting Server in this tutorial. Click “next” to continue.
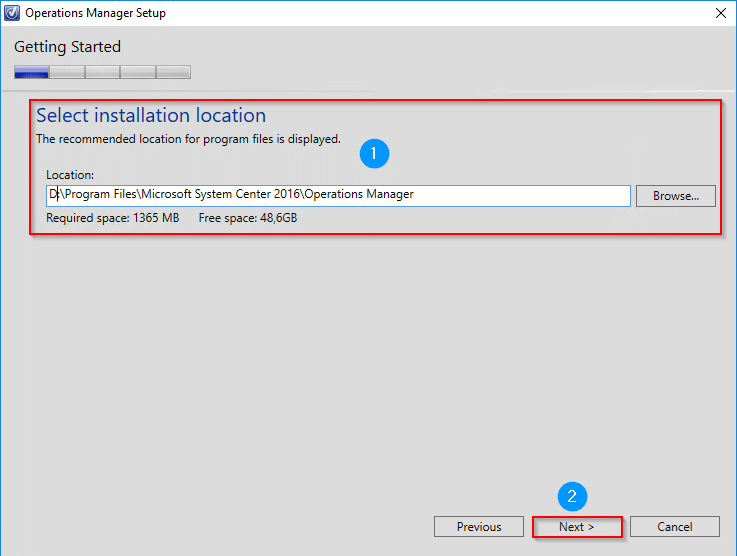
For my part, I run the full installation on the partition “D:”.
Click “Next” to continue.
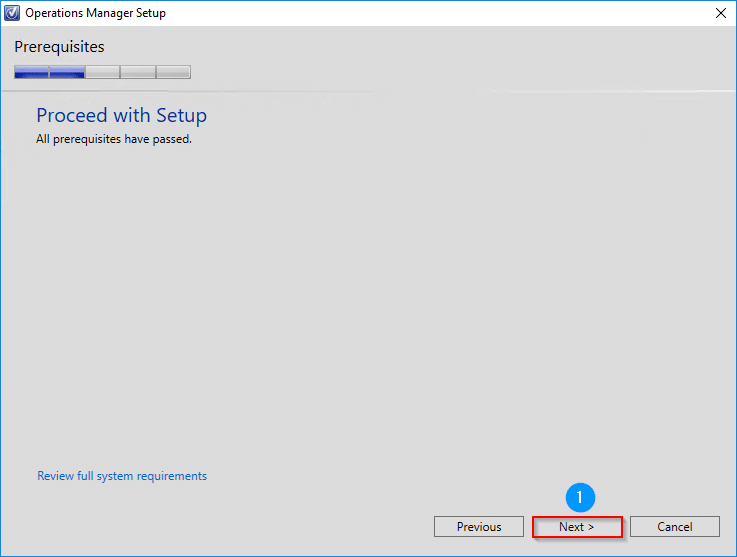
Click “next”.
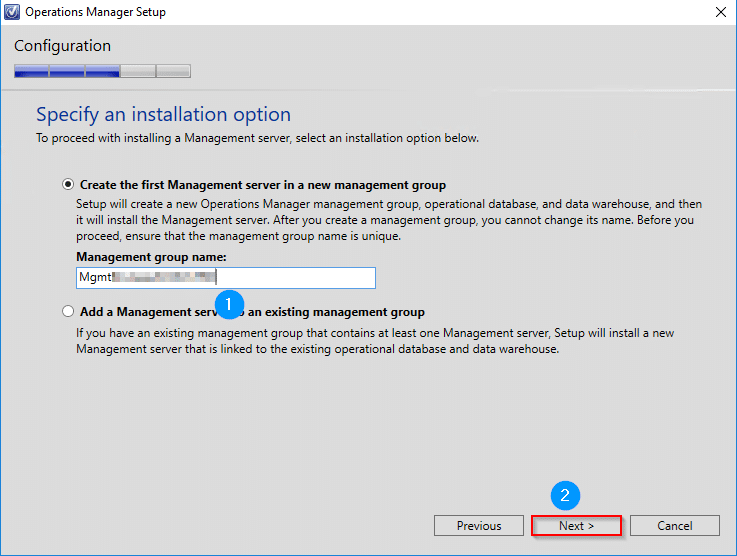
This is the first Management Server, fill in the new name of the management group.
Click on “Next”.
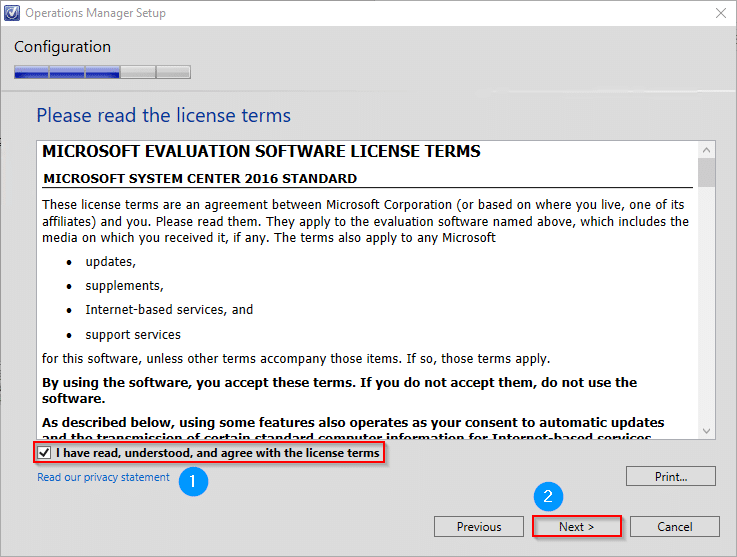
Check the box “I have read, understood, and…” and then click “Next”.
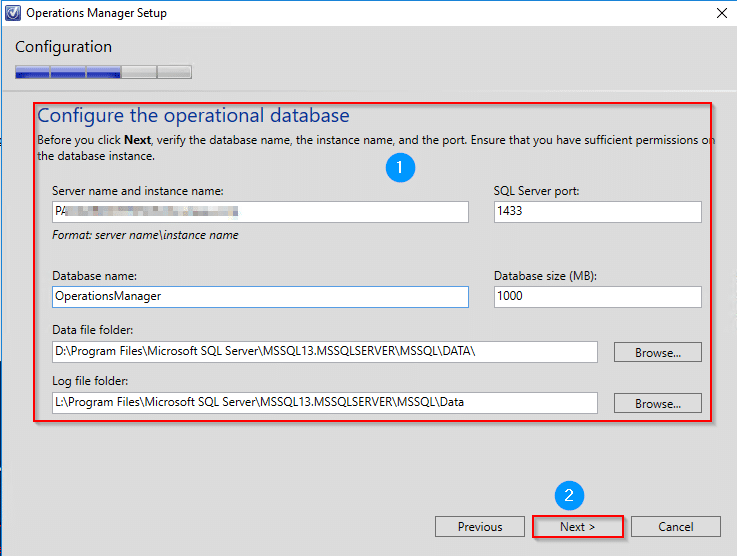
Fill in the following fields for the OperationsManager basic configuration:
- Server name and instance name: SQL Server + the name of the instance (unless you keep the default MSSQLSERVER instance).
- SQL Server port: 1433
- Database name: OperationsManager
- Database size (MB): 1000
Click “next”.
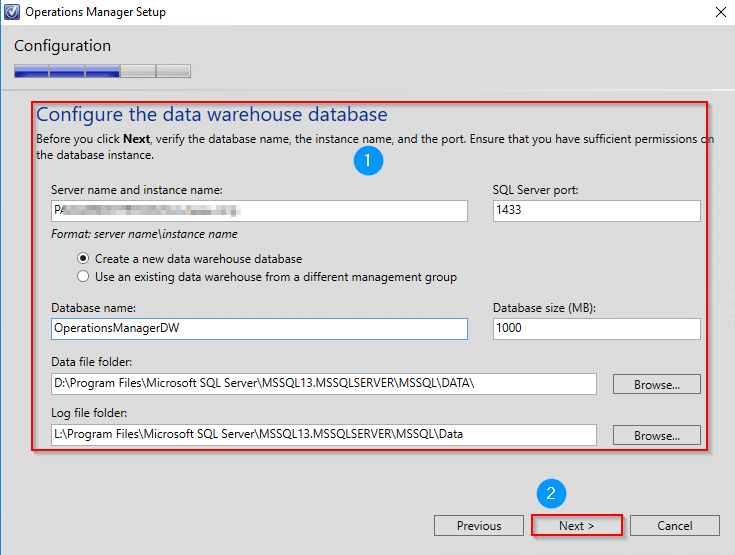
Same principle for the basic configuration Data WareHouse.
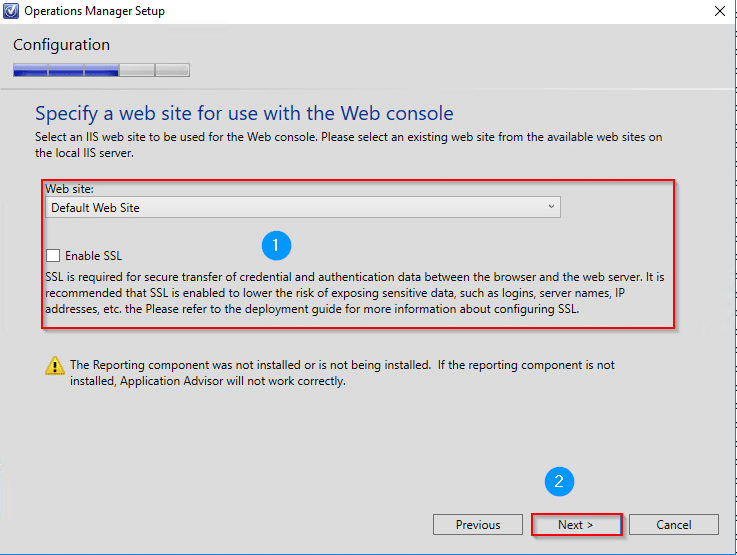
Select “Default Web Site” and uncheck “enable SSL” then click “Next”.
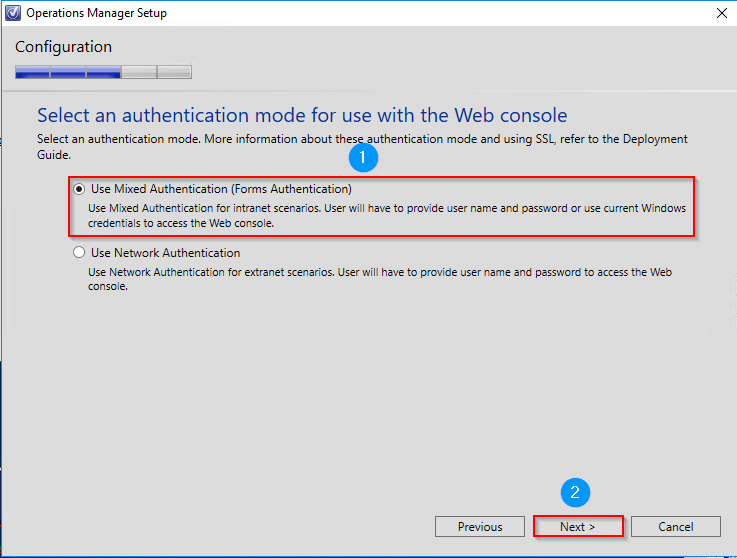
Select the first choice “Use Mixed Authentication…) then click on “Next”.
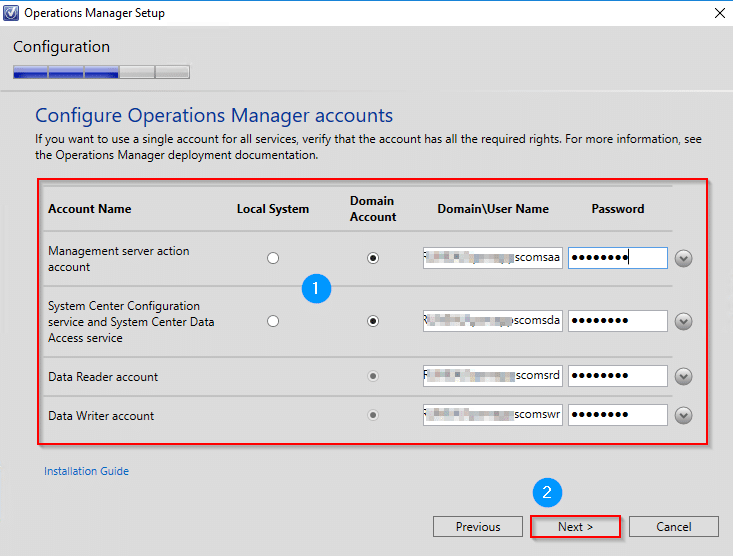
Find service accounts (I you Council to use real service accounts). Click on “Next”.
Click “Next”.
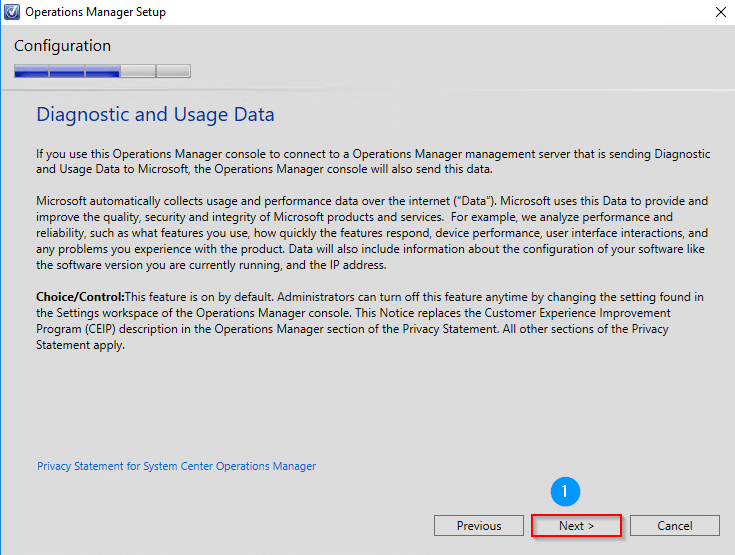
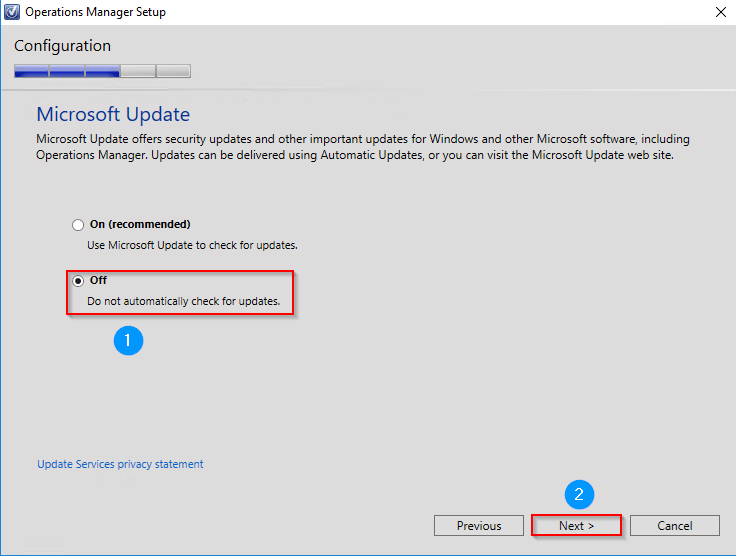
Select “Off” and then click “Next”.
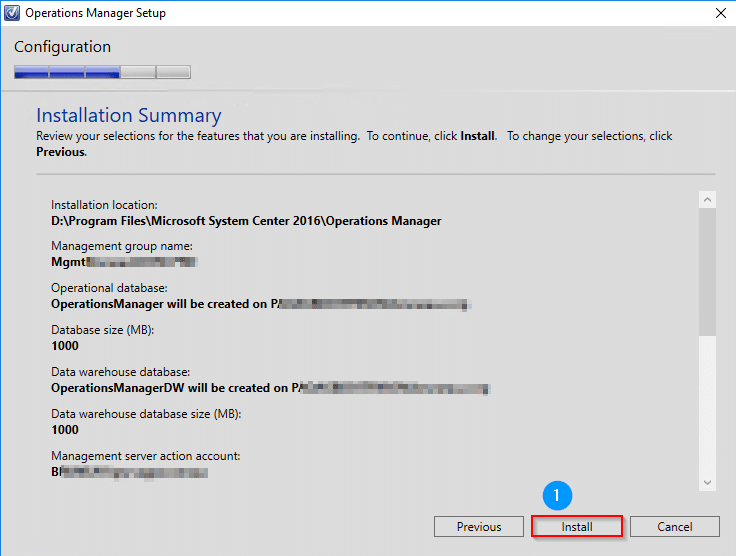
Post the summary and then click “Install” to start the installation of SCOM.
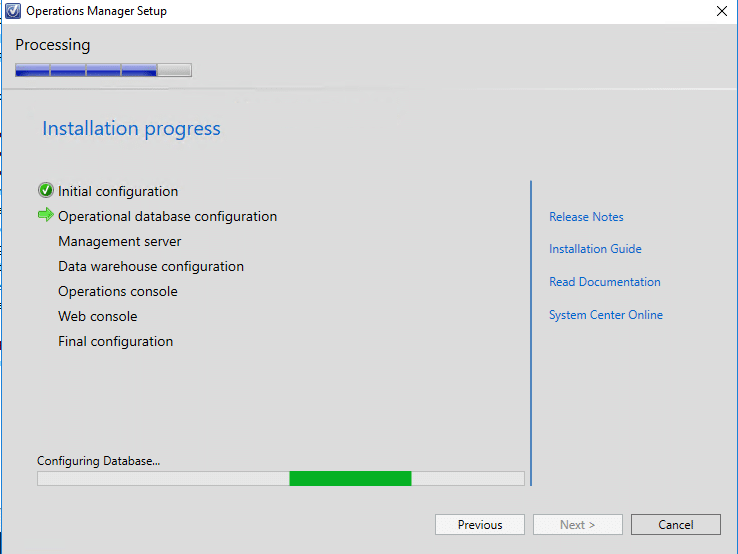
Current…
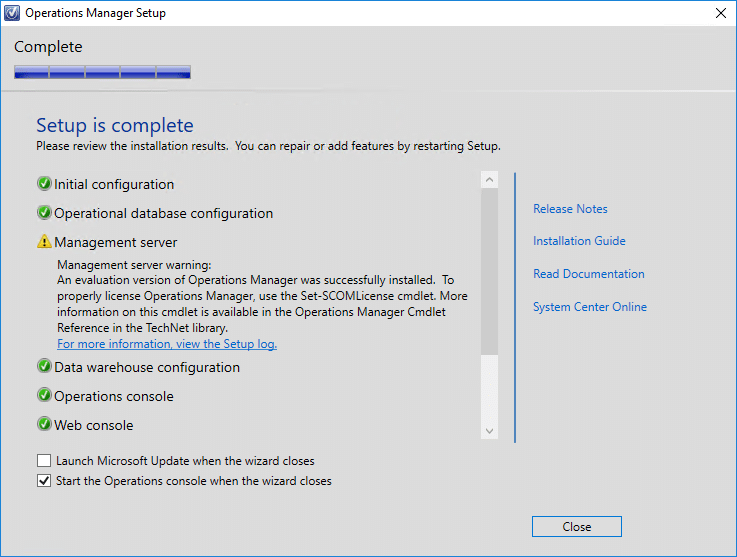
The installation is complete without a problem (we should not forget to learn the license see one of my next articles). Click “Close”.


![[TSHOOT] – SCOM 2016 : Error deleting a group](https://sys-advisor.com/wp-content/uploads/2017/11/splash_scom_2-1-218x150.png)
![[TEST]-Xiaomi: Getting Started with the Xiaomi Roborock S50](https://sys-advisor.com/wp-content/uploads/2019/02/splash_xiaomi_roborock-100x70.jpg)
![[TUTO] – Recalbox : How to add new ROMS to your Recalbox](https://sys-advisor.com/wp-content/uploads/2017/12/splash_recalbox-100x70.png)
![[TUTO]-Skype Enterprise: How to connect to Skype online in Powershell](https://sys-advisor.com/wp-content/uploads/2017/12/smash_skype_enterprise-1-100x70.jpg)


![[TSHOOT] – SCOM 2016 : Error deleting a group](https://sys-advisor.com/wp-content/uploads/2017/11/splash_scom_2-1-100x70.png)